Showing posts with label Craft. Show all posts

Wednesday, September 28, 2011

Final Summer Post: Last Minute Craft for Gym Camp


Note: I wrote up this post 2 months ago, mid-summer, but didn't load in the pictures until now.  The children loved the way this bookmark turned out.  I'm using my tester bookmark in our workbook for Story of the World, Volume 3.


Her voice in the message sounded kind of desperate.  She even ended the message with, "Please, please. please, please call me."  That's 4 pleases.  Well, you can't say no when someone asks you with 4 pleases - and those are just the last four.

See, that week was second week of Gymnastics camp.  We only planned to attend one day of this camp, and I only planned crafts for one day.

But Monday afternoon, our dear friend and camp-organizing coach learned that the mom doing crafts on Tuesday had an unexpected schedule conflict arise.  And Coach called and said, "please, please, please, please..."

So  I looked around and said, "Hmmm...Mod Podge, file folders, non-bleeding tissue paper squares, ribbons...BOOKMARKS!"

Now I know that we can pick up a handful of bookmarks for free every time we walk into the library, but still, it's fun to make one, isn't it?

This is a recycling craft, too - bonus!  Our background was used manila file folders.  So when one of the children said, "My folder says "Orange County DEP,"  I could say,  "It used to be a file folder for Orange County Department of Environmental Protection, but now we are recycling it!"  That idea was a hit. 

I had them trace the general shape of a bookmark onto their rectangle of paper.  Then we tore the tissue paper into shreds.

Then we got out sticky Mod Podge and brushes.  It seemed like most children prefer wet, sticky, messy art and crafts, doesn't it?  We painted on Mod Podge and laid down the tissue paper.  We painted a layer of Mod Podge over the top to give the bookmark more shine (I did this step for the "Littles" group while they took a play break.)  It was fun seeing how the different color combos came together.


Thursday, June 30, 2011

Day 4 Gymnastics Camp Crafts

Tie Dye Shirts! 


No, not real dye, SPRAY tie dye!  Did you think I was going to get involved in rinsing and wringing out almost 50 T-shirts again in 98 degree heat?  NO WAY!!!!


The purple and blue are our favorites.  Even with coupons for Hobby, Lobby, Joann's, and Michael's, this is a more expensive craft, so I tried to get by with just enough.  Just enough, however, is not enough.  Next time I will buy several extra cans and save the receipts in hopes of returning a few.  As it is, I will be getting some more cans and taking them to regular Gymnstics team practice, because we ran out of paint during the last group.  Learn from my mistake!


Our methodology is to lay the shirt on the ground/newspaper/cardboard, scrunch it around and spray color 1.  Then pull it open, scrunch in a different direction and sray with color 2.


If the shirt has a logo on it, spray it anyway!


Reserved for the boys:  camo set!


I loved it that quite a few children showed up the next day wearing their newly decorated shirts.


Wednesday, June 29, 2011

Day 3 Gymnastics Camp Crafts

Glass Refrigerator Magnets!


We made these same fridge magnets last year.  The campers who were there last year were excited to make magnets again.  This year I chose a couple of patriotic scrapbook papers.  This year, too, I found (well, our gymnastics coach found) the large flat-backed glass marbles at Dollar Tree.  They were a hit!

Tuesday, June 28, 2011

Day 2 Gymnastics Camp Crafts

Bugs on Rocks!


I painted bugs on rocks last spring with the Sm'Arties, and at the time filed away the idea for Gymnastics camp. 


To make the process flow quickly, all the rocks arrived with little faces - eyes and a mouth.  The perfectly round eyes come from a dab of white paint applied with a pencil eraser.  The black eyeballs are dots from the handle end of a skinny paintbrush.  I drew the little mouths, some happy, some squiggly.  Each child picked a rock and got to work.


I only brought about 3 regular and 2 skinny brushes so I could keep control of the groups. 

Our procedure:

- Line up.

- Pick your rock, write your name in Sharpie on the bottom.  Both names, please! - we have 3 Hannahs and 3 Graces.

-  Hold your rock, and get back in line.

- When it is your turn, paint the little half-circles for wings in a solid color. DON"T DECORATE IT YET! 

- Get back in line.  Hold your rock.

- When you get to the front of the line, your rock will be dry enough to paint some decorations - spots, stripes, etc.


- Leave your rock to dry.  Miss K-Sue will spray it with shiny spray later.

Monday, June 27, 2011

Day 1 Gymnastics Camp Crafts

Last year I got roped into volunteered to do crafts at Gymnastics camp.  Fun? Hot? Overwhelming? Exhausting? Heat exhaustion-type exhausting?  All of the above! 

So, of course, I did it again last week.


My campers ranged in age from 3 to 13 years.  There were over 45 campers, divided into 5 groups.  Group 4, the 12 boys, were a riot.  The challenge for me is to discover what kind of crafts are not unreasonable in expense, work in the timeframe, hopefully dry by 1 p.m., and can be made doable for preschoolers and highschoolers; boys and girls. 

For Day 1 (and Day 4!) I took a page from Earthgirl's 6th birthday party, a 70s shendig, and brought a spool of leather thong rope and a big container of pony beads.  Simplicity itself!


They were a hit with girls and boys. 


Monday, September 13, 2010

While we are waiting for Sm'Arties to start again...

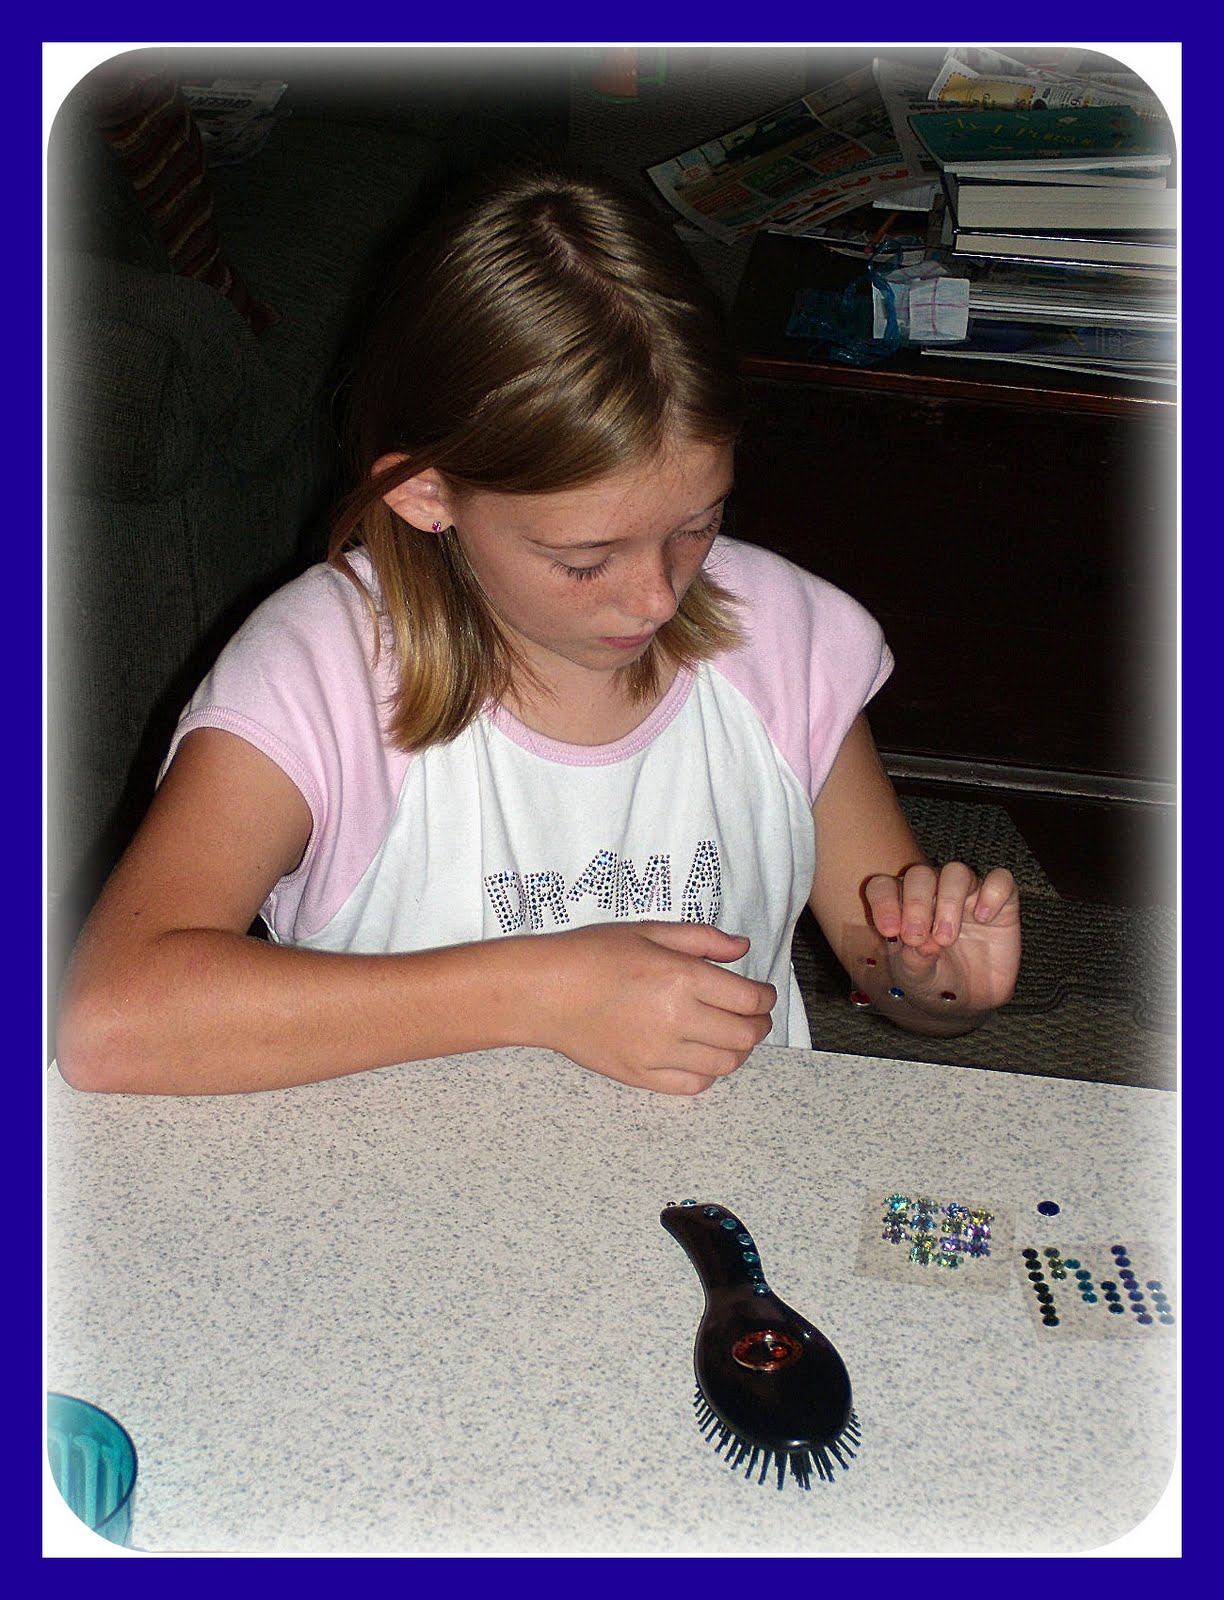
...this has got to be the easiest birthday party craft ever!


Hairbrushes from Dollar Tree, stick-on "jewels" from the fabric crafts section of Michael's.


The results are sparkly-spectacular!


My definition of a successful birthday sleepover:


Nobody cried.
Nobody threw up.


Saturday, June 19, 2010

Crafts at Gymnastics Camp - Day 1 - Refrigerator Magnets

Last week I "did crafts" 3 days at Gymnastics Camp. Almost 30 girls and boys, age 4-17 ran, played, jumped, danced, flipped, and  did a few crafts.


It's fun to create refrigerator magnets made with flat-back glass marbles (I bought these at JoAnn's floral section), scrapbook paper, Mod Podge, and magnets.

I've seen these several places, including  E-How and DailyDwelling.

They are so simple and quick, and the designs are only limited to what you can find on a piece of paper.  I cut some designs from my scrapbook stash, and printed out a few stylized gymnastics clip art pictures.
 

The children chose paper squares, brushed the backs of the glass marbles with Mod Podge, and smushed the marbles onto the face of the paper.  When you first paint on the Mod Podge, it appears cloudy, but soon it dries crystal clear.


While the initial coat dried, the children ran off to play one game of 4-Square.  Then back they came to trim edges and "glue" on magnets using Mod Podge as the glue. All done!  Pick them up on your way home!

 A few hints and observations:

- Since we were marking these on the back before they were totally dry, we had some bleed-through of Sharpie pen on some magnets

- Buy the heavy-duty magnets - they are so much stronger.  KEEP THE MAGNETS SEPARATED DURING THE DRYING PHASE!  These magnets are strong enough to pull together, and you come back to find a magnet has slid right off one marble onto its neighbor.

- 5-year-olds need a lot of help trimming

- When I did this at home, I took the time to seal the back with Mod Podge also, but didn't while working in 30-minute classes.  

More Gymnastics Camp crafts soon!

Monday, March 8, 2010

Buttoned Up

Last week Science Geek had our children out doing cool science, measuring windspeed and direction.  These 2 pictures  have nothing to do with art, but I thought our girls were cute.


During Sm'Arties, we went more in the crafts-and-skills direction.  We learned a very valuable lesson - how to thread a needle.  We threaded  big plastic yarn needles first.


Having mastered the art of threading a needle, we threaded up a steel needle so we could sew a big button on a piece of flannel.  I bought large-eye needles for the children, but I think they will be useful for me as I progress into presbyopia.


 Whoops!  Speaking of presbyopia, there are my really strong reading glasses, the ones I use threading a needle.
 Good job!


Then I told a little story about one of our boys growing up to become a very cool best man at a wedding.  The groom comes to him distraught because a button has fallen of his shirt.  The very cool best man says, "Give me the shirt, give me the button; I'll take care of it."  In one version, the very cool best man said, "Dude...give me the shirt, give me the button."  

Coincidentally, it just so happened that 7 buttons had fallen off my husband's shirts, just that morning.  Amazing isn't it?  And just a week after he sent me down the well?   Sm'Arties to the rescue!


I am pleased to report that my husband can, once more, button his cuffs.  And all the Sm'Arties can sew on a button.